I’m not overstating it when I say this Easy Spice Shelf DIY was an organizational dream come true for me. I’d been stacking my spices in an awkward corner of my kitchen for a while and had been searching stores and websites looking for a storage solution. Spoiler alert: I came up short with every rack or organizer that I found; they either took up too much counter space in my little kitchen or didn’t hold enough of my beloved spices. So when I came across a worn-out looking little hutch at an estate sale for $5, I decided to give it a little love and make it into a new home for my spices.
On an Edited Kitchen-related note, having your spices in order makes a world of difference when it comes to maintaining a healthy lifestyle. First, spices are essential to making healthy proteins and veggies taste flavorful and exciting. Say you have a relatively bland protein (e.g., the notorious boneless skinless chicken breast). If you add the right amount of rosemary, thyme, and garlic to it, you’ll be craving that chicken instead of fast food. That’s a win for spices. Second, organizing (and alphabetizing) your spices makes last-minute, healthy meals so much easier to just “throw together.” You won’t waste time searching for ingredients you need when you come home late from work. Spice organization makes a world of difference.
Now with that tangent out of the way, let’s move on to why you’re really here: this ridiculously easy spice shelf DIY.
The process
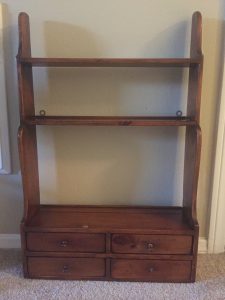
First you’ll need a little hutch like the one I’ve used here. It can be a simple little set of shelves, or have drawers like the version that I have. It doesn’t need to be “pretty.” Whatever piece you choose, the bulk of the work you’ll be doing is simply refinishing it, so you’ll need to get some sandpaper and wood stain. I recommend buying a stain with polyurethane built in (like this Varathane stain I used). Who has time to wait for all of that stain drying and then put on a bunch of polyurethane afterward? Not me. I chose a dark cherry color that’s similar to my coffee table, but any sort of wood stain will do.
You’ll want to start by sanding all of that original paint or wood finish off of it with a medium grit sandpaper (like this 3M one that I used). This was the most time-consuming part of the process, but it’s necessary in order to start with a nearly blank slate. Because this was such a small furniture piece, I sanded it by hand, but if you have an electric sander, have at it. I am not a Pro DIY-er by any stretch of the imagination. So using a few pieces of sandpaper did the job for me. And bonus: it was pretty therapeutic.
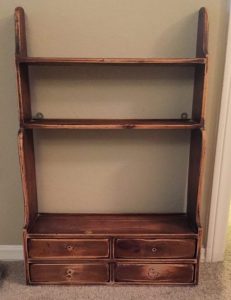
 After sanding it, you’ll stain it with the aforementioned wood stain with built-in polyurethane. Spend a couple extra bucks on that kind, and you’ll thank me later. One note here: I had to put approximately 7-8 coats of the stain on this piece to get it to the color I wanted. You’ll need to adjust the number of coats per your desired finish. I can’t tell you if that means it’s going to take three coats or 12. It’s very much like cooking: I can give you the recipe, but you’ll need to adjust the heat and spices and time to get it tasting “just right.”
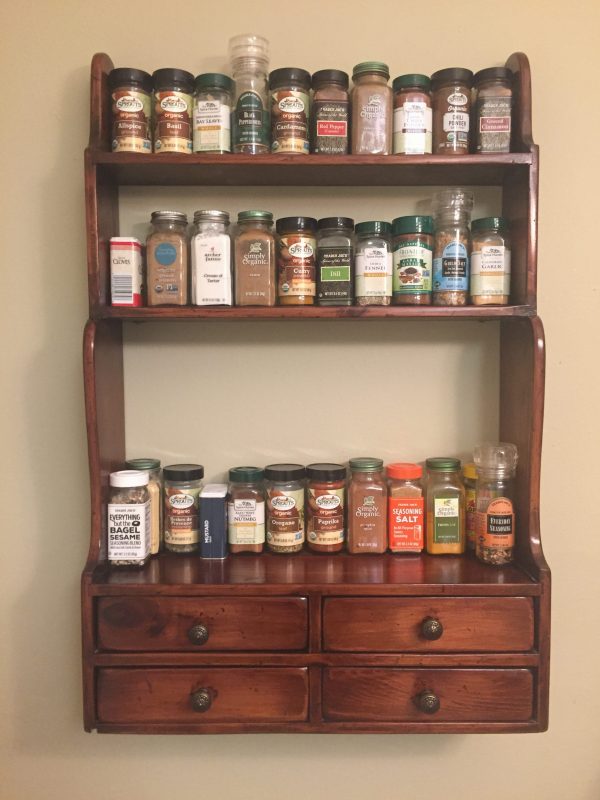
Once it’s dry, add your finishing touches (like these drawer knobs from Hobby Lobby if you have a hutch with drawers). Then, hang it up or place in a convenient spot in your kitchen, and start filling it up with all of your favorite spices.
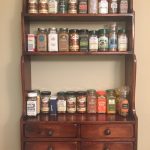
And there you have it: An easy DIY spice shelf that takes just a few hours of work and less than $40. You’re welcome.
Easy Spice Shelf DIY
Ingredients
- Small wood hutch or shelf $5.00
- 1 can dark wood stain $14.00
- 1 thin cloth or rag that you don't mind trashing
- Medium-grit 150-200 sandpaper ($4.00)
- 4 small wooden knobs $10.00
Instructions
-
If there's excessive dust or dirt on your hutch or shelf, clean it off with a soft damp cloth
-
Sand the entire piece with sandpaper (except the back or anything you know won't be visible), including the individual drawers
-
Before staining, dust it off thoroughly using a soft cloth
-
Open your wood stain and stir with a wooden dowel or paint stirrer
-
Add a small amount to your rag and gently work it into the wood, going with the grain
-
Cover the entire piece, adding additional coats as needed for your desired finish
-
Once completely dry, dust off with a gentle wood cleaner and reassemble, placing the drawers back in and adding in knobs
-
Mount to a wall or place in a convenient spot in your kitchen